Welcome to another edition of Tutorial Tuesday!! (According to a number of readers) This post is LONG overdue. For ages, readers have been asking me to show them how I make my Large Quilted Scrap Baskets. (One of five sizes that I make for myself and for gifts!) I normally just provide the links I've used over the years:
Fabric Bucket by Christina Cameli HERE. (Removed from site.)
QAYG Fabric Basket Tutorial from Bubs Rugs.


However, my tutorial tester suggested that I use something a little less busy to see the steps easier, enter the 18.5" x 22" LIGHT Neutral basket panel shown below, which is closer to the size I normally use for my Large Quilted Scrap Baskets:


2. Turn the basket inside out and pin the binding (raw edges together) to the top edge to test for length. Beginning and end of appropriately sized binding should overlap by a half-inch. Cut binding to that length (or attach as you would on any quilt and then trim.):

3. Form a loop by stitching the two ends together and finger press the seam open:

More recently, I tried the Fabric Skinny Bin by Kitty @ Night Quilter.
These were fabulous resources. Thank you SEW much to the creators! While each of them shaped a portion of my technique, there were specific areas of those tutorials that didn't appeal to me. Thus, began the basis for this post, which appears to have been inevitable.
Sometimes, I'm just a little slow...
For my basic basket you will need the following materials:
Scrap fabrics in the color(s) of your choice (or 1 FQ for outer panel)
1 fat quarter (or equivalent) for basket lining
1 piece of scrap batting(slightly larger than your basket panel)
1 piece of Decor Bond fusible interfacing (optional)
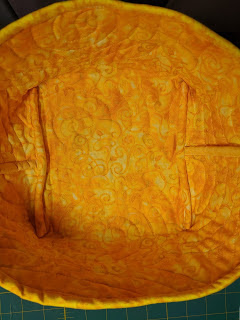
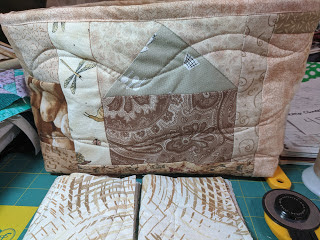
Most of my Quilted Scrap Baskets start out looking like this:

For this tutorial, I started out with a simply pieced panel with borders that will eventually form the top of the basket. This panel measured 20 x 23, as I was testing for a Super Jumbo basket, but accidently cut my fabric a little too small:

However, my tutorial tester suggested that I use something a little less busy to see the steps easier, enter the 18.5" x 22" LIGHT Neutral basket panel shown below, which is closer to the size I normally use for my Large Quilted Scrap Baskets:

Layer your panel with batting and a lining, then quilt it, because you are basically making a small wall hanging that you will magically transform into a quilted scrap basket:

Baste using your preferred method:

Note: For a more structured basket with greater stability, start with your basket panel, add batting and quilt as desired. To that, choose a lining fabric and fuse the same size piece of Pellon 809 Decor-Bond fused to it before assembling the basket. I only choose to do this for baskets that won't be stuffed with fabric scraps! (A more dense quilting design also adds some structure without the use of fusible.)
Next...
Lay the quilted basket panel out in front of you with the short sides on the top and bottom. Fold the bottom edge up even with the top (right sides together) and stitch the two sides. Note: This forms what looks like a laptop sleeve.
Lay the quilted basket panel out in front of you with the short sides on the top and bottom. Fold the bottom edge up even with the top (right sides together) and stitch the two sides. Note: This forms what looks like a laptop sleeve.

Also note: If you accidently pair the short sides, you will end up with more of a tray shape, instead of a basket.
Where were we???
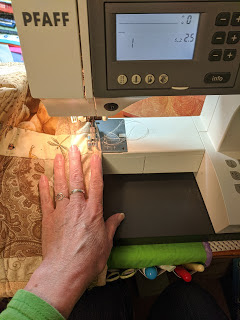
Sewing up the sides. I use a straight stitch...


Followed by one of my construction stitches to cover the raw edges:


Alternatively, this is the point where you could choose to bind the raw edges, as in the following example:

I don’t bother because my baskets are all stuffed with fabric scraps!!
In review...
Using my sizing, you can see the left and right edges measure 11"...

... While the top and bottom edges measure 18.5" shown below:

Since we're not making a laptop sleeve, let's continue...
The next part of the process is to shape the basket. This is accomplished by "boxing the corners" using the following steps:
Step 1 - Stand the “envelope” up then open it while folding down the right side seam toward the center of the basket, matching it to the center seam of the basket bottom:

Step 2 - Flatten the right side of the basket so that the bottom right corner forms the point of a triangle. From there, you will measure from the top rim of the basket (only remaining raw edge) down toward the point. Mark a line with your Hera Marker or just drop in a parallel line of pins close to your ruler:

Step 3 - Do the same thing for the left side of the basket:

Step 4 - Flip the basket pretty side out and push out the boxed corners to test the size and shape of your basket. If it’s the size you want, flip the piece wrong side out and sew the seam you marked by stitching just inside your row of pins (or on your marked line.):

Step 5 - Not the size or shape you were hoping for?? Go back to step two! For every inch longer or shorter you mark the line from the tip of the triangle, your basket will be that much taller or shorter. After repeating step two and three, test the basket again, as in step four:

Once you've gotten your basket to the size and shape you'd like, sew on your marked lines and trim the seams to a quarter inch and then use one of your machine’s construction stitches to finish those edges, just as you did the side seams.

Yay!! You’re getting closer to completing your Quilted Scrap Basket!!! Any questions? Leave a comment with your email address in the comment section below.
Finishing the basket...
For me, this means binding the top of the basket with "quilt binding." You can choose to finish the top by attaching a wider folded strip for a "cuffed" edge.
If you choose to bind your basket, this is the method I use:
1. Cut a 2.25" strip of coordinating or contrasting fabric. Press in half to create binding for the edge:


4. Stitch binding to the lining, through all layers of the basket.
5. Turn basket right side out. Pull the binding fabric around to cover the raw edges. Pin in place, so that binding just covers the line of stitching used to attach it to the basket. Stitch in place near the edge of the binding:

6. Trim threads and breathe a sigh of relief. Your basket is DONE!!

Suggestion: To get larger baskets to stand up properly (without stuffing them full of fabric scraps), stitch an eighth-inch or quarter-inch seam line up the full height of each of the corners. I haven’t done this, but one of my Bee mates recommends this.
Acknowledgements:
Between Black14jeep and Knittingsuek, I finally bit the bullet and came up with an outline for the tutorial that my blog readers have been asking for. I owe you two my thanks. Lynn's request and Sue’s hard push motivated me to do this thing!
To Lynn:
I appreciate your patience with my piecemeal tutorial. Thank you for your feed back! You made some valid points.
Thanks for saying that my directions were great. (I think that might be an overstatement, but I did the best that I could.) I'm glad that you were successful in making the basket that you had in mind! You were SEW sweet to offer to review the tutorial before it goes live on my blog.
To Sue:
I appreciate your constant encouragement and the BIG push you gave me in getting this tutorial put together.
To LeeAnna:
Your challenge to get the basket done was SEW what I needed in order to finish this tutorial. Thank you, again!
To Britt:
Thank you for serving as my editor for this post. Your help with the instructions for basket shaping was extremely helpful! Sometimes words are not my first language. :P
To my readers:
Thanks for coming back week after week to see what I've been up to in the studio! You've made my little corner of the internet more than my online journal, you've made it a community. Thank you.

If YOU use this tutorial to make your own Quilted Scrap Basket, please LINK to this post, so that others may enjoy making one, as well.
Sharing with Cynthia
for
Until next time...
MAKE quilted scrap baskets!!


