I've been so busy with work that I haven't posted in a week. That's the way it goes sometimes. . . all work and no play! It makes me a VERY sad quilter. (Picture my frowning face here.)
Months ago, I designed this 8.5" x 11" Journal Quilt as a pencil drawing on muslin. I waited (and waited) to implement the design. Why? I couldn't decide how I would accomplish the piecing.
At first, I was thinking that I would do foundation piecing. That is by NO means a favorite method of mine! A friend suggested fusible applique. That's when I knew my design could become a reality!
I hope you like the (unfinished) result.
Sunday, August 29, 2010


Friday, August 20, 2010
Michael's T Quilt - DONE!!!
After MANY hours of work, Michael's T-shirt quilt has been completed. This quilt was quite a challenge, using a number of items that were NOT t-shirts. (Note the He-Man head in the bottom left corner - a back pack front, the Green Beret, and the graduation Mortar Board!) It took a lot of creativity to come up with a pleasing design. In the end, I think you will agree that I did a good job...if I do say so myself! LOL
The quilt was supposed to be as small as I could make it using the items provided. It turned out to be 67" x 91" and that was as small as I could make it!
On to the NEXT project...

The quilt was supposed to be as small as I could make it using the items provided. It turned out to be 67" x 91" and that was as small as I could make it!
On to the NEXT project...
Wednesday, August 4, 2010
Progress - Upside Down
This photo was taken from the top down, hence the funny looking angle and the name of the post. Oh, well...a bad picture is better than NO picture. Right?
Everything is cut. The blocks are ready to sew. However, the borders still need a bit more work! I have to decide if I can cut down the two corner squares and plan the borders accordingly.
Soon enough, this will be my next completed UFO. Wish me luck!

Everything is cut. The blocks are ready to sew. However, the borders still need a bit more work! I have to decide if I can cut down the two corner squares and plan the borders accordingly.
Soon enough, this will be my next completed UFO. Wish me luck!
Wednesday, July 28, 2010
Blue & Yellow Woven - Altered
Here's what I did to the Blue & Yellow Woven quilt. I had intended to do a Sunflower in quilting, but somehow I ended up with an appliqued Sunflower, stem and leaves. There may be more to come.
This is the first time I've added appliqued to a pieced background. (Or in this case, a faux-pieced background!) The quilt is a bit busy. Perhaps, it needs a BIG bumblebee...

This is the first time I've added appliqued to a pieced background. (Or in this case, a faux-pieced background!) The quilt is a bit busy. Perhaps, it needs a BIG bumblebee...
Tuesday, July 27, 2010
The Quiet Quilter
It's been almost 10 days since my last post. Why? Lots going on around here. I played "Mom's Taxi Service" all last week and if I wasn't dropping one son off, I was picking up the other one! The time in between was spent working on knitting and quilting UFOs, but nothing was completed.
:o(
During the week, I worked on three (oops! four!) different projects for the UFO Club. I shared this information on Ravelry, but didn't have any new pictures to share here. I worked on Michael's T-shirt Quilt, trimmed down the Jacob's Ladder, completed the next step on my Circle Denim Quilt, and added applique to the Blue & Yellow Woven quilt.
Just when I was ready to post a picture today...I realized that I left my project in a friend's car!!!
Bummer!!!
Photos of the applique work that I did will follow at a later date. (The other work was too boring for photos.) For now, you'll have to imagine a Sunflower on my Blue & Yellow Woven quilt. It's almost done! I just have to decide on binding. I auditioned a number of fabrics yesterday, but the RIGHT choice wasn't among them. More news later...
:o(
During the week, I worked on three (oops! four!) different projects for the UFO Club. I shared this information on Ravelry, but didn't have any new pictures to share here. I worked on Michael's T-shirt Quilt, trimmed down the Jacob's Ladder, completed the next step on my Circle Denim Quilt, and added applique to the Blue & Yellow Woven quilt.
Just when I was ready to post a picture today...I realized that I left my project in a friend's car!!!
Bummer!!!
Photos of the applique work that I did will follow at a later date. (The other work was too boring for photos.) For now, you'll have to imagine a Sunflower on my Blue & Yellow Woven quilt. It's almost done! I just have to decide on binding. I auditioned a number of fabrics yesterday, but the RIGHT choice wasn't among them. More news later...
Sunday, July 18, 2010
Dye Frenzy
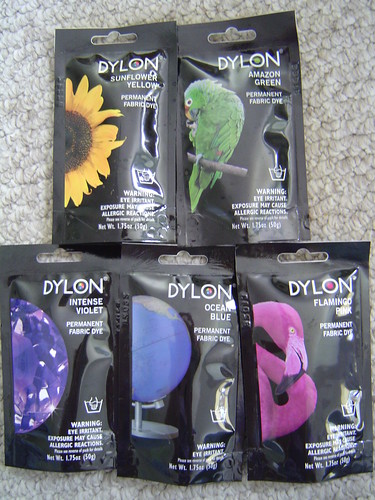
Yesterday my quilt bee got together for a Dye Frenzy.  We used DYLON Permanent Fabric Dye. It takes 4 cups of warm water to dissolve and you add 4 Tablespoons of table salt to that. For a deeper or more vibrant result, that's it! Simply drop in your fabric and wait. Otherwise, you can add up to 4 cups of cold water to increase the amount of fabric that you can dye.
 We used DYLON Permanent Fabric Dye. It takes 4 cups of warm water to dissolve and you add 4 Tablespoons of table salt to that. For a deeper or more vibrant result, that's it! Simply drop in your fabric and wait. Otherwise, you can add up to 4 cups of cold water to increase the amount of fabric that you can dye.
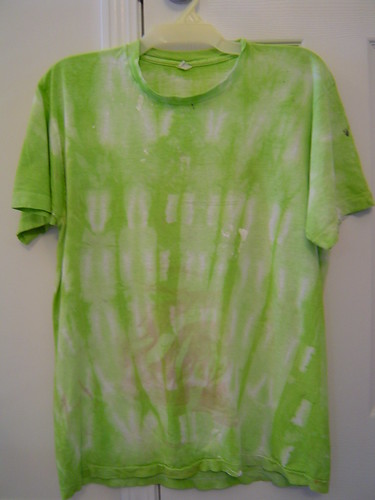
We each brought a pack or 2 of dye and some fabrics. Note: Fabrics MUST be prewashed! If not, the color won't take. The colors we used are shown in the photo. Not shown are Radient Red, Goldfish Orange, and Tropical Green (which was used to dye the old T-shirt shown.)
The method used for dyeing the T-shirt was to accordian fold it lengthwise and place large office clamps at varying intervals. I'm pleased with the way it turned out. It could have been considered for over-dyeing, but I ran out of time.
The purple piece was done by drawing lines with glue gel, allowing the glue to dry, and then placing it in the dye bath. The color turned out light because I did this one last and ran out of time. This technique opens a world of possibilites!
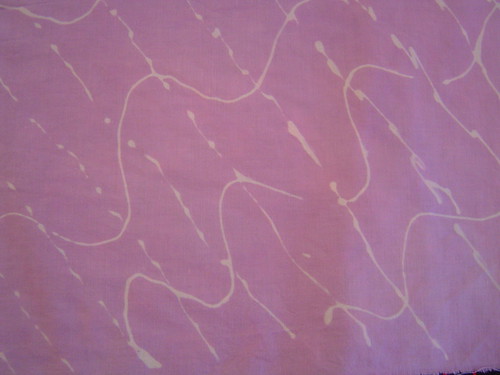 This technique opens a world of possibilites!
I would recommend this activity to any group of quilters. Smaller groups can get away with 1 pack of dye per color (for use with smaller pieces of fabric, such as Fat Quarters.) Larger groups, or if your group will be dying yardage, may want to use 2 packs per color. Our group used 1 pack per color and had dye leftover!
Combine the dye packs with a couple of buckets or tubs from the Dollar Store for each color (one for the dye bath and one for the rinse water) and this is an affordable project. Better still...It's TONS of fun!
The only thing I would change about our event would be to add tables next time for the rinse procedure. It often takes some time and multiple buckets of water to rinse out the excess dye. It's rather back-breaking work, if the rinse basins are on the ground. We might also want to have more squirt bottles and some spray bottles available for additional dyeing options.
I really hope you will try this with your group of quilting friends.
Thursday, July 15, 2010
Another One Bites the Dust!
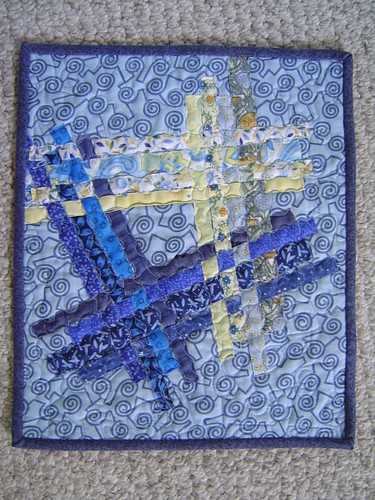
I am pleased to report that my 2nd quilt has been completed for the UFO Club. This one is was an experiment in making a woven quilt. A friend had made a clock using woven strips and I thought I'd give it a try using the trimmings from The Margaret Mystery.
I attempted to show you the back of the quilt (featuring the quilting) and a close-up, but (for some unknown reason) the pictures kept disappearing from my post.
Anyway, I used wavy lines to counteract the straight strips and mimicked the swirls in the background.
I did something on this piece that I wouldn't repeat. The strips were woven without adding fusible interfacing. This made it a bit difficult when it came to the actual quilting! The close-up showed the fact that not all of the edges are completely stitched down. I chalk that up to the freeform technique that was used in the making of this quilt. Enjoy!
Subscribe to:
Posts (Atom)